Cook Like a Pro or Make Believe
You’ve come to the right place.
Here you will get some tips on how to cook better. We hope to make your life easier with some of the cooking tips on this page and website. Why struggle preparing that next dish Cooking should be simple and fun.
Many people like watching the normal and crazy celebrity chefs on television. Do you have a dream to become a famous chef too one day? Well, it may be a good idea to learn some basics first about cooking. I hope that this page will help you to be the chef you were meant to be. Let’s face it some have a the gift of cooking and other have to work at it and learn things from others all the time. Whichever you are, it’s all good. Just be yourself and go with your instincts along with what others teach you.
When you’re brand new in the kitchen, cooking may be a bit intimidating if you’re the kind of person who only knows how to boil water. But don’t worry, once you’ve mastered a few basics in the kitchen you can probably advance quickly.
This page is devoted to regular some everyday simple tasks performed in the kitchen, tips and tricks and later some advanced stuff too.
Some of these tips may speed up your prep and cooking time in the kitchen. Maybe you have your own tricks already. If so post a comment here and share it with others.
This page is for sharing cooking tips and tricks in the kitchen to help everyone cook a better meal faster and easier. So here are a few kitchen hacks and tips to get you started until we post more later. GET MY NEW MINI BOOK FOR FREE HERE IT’S CALLED “SECRET INGREDIENTS”
COOKING EGGS 101
Crack That Egg

Just a few egg tips here since eggs are one of the basic protein foods in life. I love using the edge of a fork to give a firm swift Karate chop to the egg I’m opening. This helps me for a few reasons. One, I don’t the egg shoot out or run down the sides. And second, it puts a nice clean slit into the eggshell where I can put my fingers into and open the egg easily, and usually without small pieces of eggshell falling in. I then use the same fork to scramble it with since I love making omelets and scrambled eggs all the time.
Hard Boiled Eggs
This is probably the easiest way to cook those round little white things.
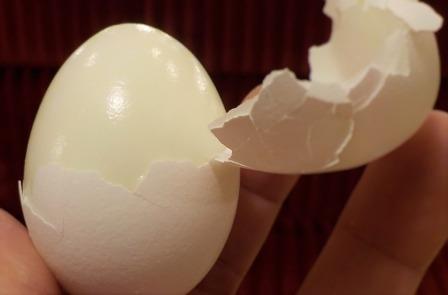
It doesn’t require much brain power and you can do it while you’re still half asleep. But we don’t recommend doing this when your very tired because kitchen safety should be your #1 priority. We do not want you burning down the house because you left the stove on and forgot about it or went back to sleep! Trust me on this one. Ask me how I know.
Basically, you just:
- Carefully place a few eggs in the bottom of a dry pot. Then fill it with enough water to totally submerge the eggs.
- Next turn the heat to medium-high.
- When you see the water rapidly boiling you can then turn off the heat.
- You must leave the eggs in the very hot water and cover the pot and wait about 9 to 10 minutes for the eggs to cook.
Sounds easy? It is! After 10 minutes has passed you can take the pot over to the sink and let cold water run and overflow for about 1 minute. It will cook the eggs and stop them from cooking, and also cool the pot. After a few minutes you can refill the pot with cold water to finish cooling them.
I like to refrigerate mine after they have cooled all the way or if I’m hungry just eat one.
Rise each egg shell well if you don’t want to peel them yet. Any bacteria should be pretty much killed from the boiling water but, it’s better to be safe by giving a quick rise with your fingers, then wash your hands.
I like to dry them with a paper towel them place them in the refrigerator in a plastic container or plastic wrap until needed.
They should stay fresh for at least 2 to 3 days in the refrigerator, no prob. This is how I make them and they come out perfect every time.
If you want them a little less cooked you can cook them for a minute or two less depending on how soft you’d like the yolk.
Extra Tip for Refrigeration
My basic rule for any cooked protein is that I refrigerate it when done cooking after cooking and eat it within 3 days. Anymore I toss it in the trash usually. I’m only talking about protein. Veggies, fruit and starches, up to about 5-7 days. Always look at and smell things before reheating or eating them anyway but it’s safer to use the 3 day rule. Also you should keep all things properly covered and sealed! Make sure your containers have a tight seal “all the way around”.
Scrambled Eggs
How to make great scrambled eggs without them sticking to your stainless steel pan!

Here’s an easy short version of the way, my american teacher who graduated from Le Cordon Bleu School taught us to make them back in the 70’s.
Now I know there are other ways to make them but this way cooks them very quickly and they tend not to be runny.
Pan needed: Stainless steel omelet pan.
Pan temp: Medium-high
It’s a lot easier than you may think. I suggest using a very clean pan this will help. And every little bit counts.
Here are the four main tips to keep it from sticking.
- Have a clean pan.
- Make sure it’s hot enough.
- Make sure there is the proper amount of butter (at least a heaping tablespoon) or oil to coat the entire pan. Butter preferred.
- Keep things moving after you let them sit for 10 seconds depending on how hot the pan is.
THE STEPS
- Scramble your eggs in a bowl or a container and have them ready with a pinch or two of salt.
- The most important thing to do is to warm up your pan to the proper medium temperature, (maybe about 1 minute or 2) but not too hot, or you’ll burn the butter.
- Melt a heaping tablespoon of real butter! No margarine please ever. Melt it, coating the entire bottom of the pan and lightly heat it, just before it changes color. You don’t want it burning, but at the same time you don’t want it too cold or the eggs will stick.
- Pour the beaten eggs into the pan and when they start to sizzle and bubble then start to pushing them to the center of the pan to prevent sticking, using the same tablespoon you just used for taking the butter with.
- After the eggs are pilled into the center of the pan flip them over with the spoon or if you have flipping skills go for it without the help of a spoon.
- Then a few seconds after flipping them turn off the heat and start breaking them into small pieces with the same spoon. They should be done within a total of 20 seconds after flipping them over.
- Plate immediately to avoid over cooking.
Don’t forget to have your toast of pancakes ready before making the eggs since the eggs only take about one minute to make and will get cold fast.
Wallah, you’ve made eggs in a stainless steel pan that didn’t stick hopefully. Your stainless steel pan can now be called a a non-stick pan. I believe this is a lot healthier for you and also makes the food taste better. I never have problems with them sticking unless the pan was too cold when adding the eggs or the pan wasn’t clean enough!
Breakfast is an excellent thing to learn to cook first. It’s easy and helps you start your day.
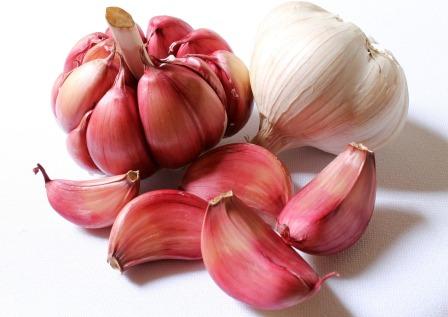
GARLIC HACKS AND TIPS
How many chefs on TV tell you to wet the garlic so the skin won’t stick to your fingers?
None that I know of.
Why is that?
Probably because they’re too busy trying to impress you by smashing the daylights out of that poor little garlic clove. Maybe this can be due to the fact that the show producer or company asks the demonstrator of the recipe to make things exciting and keep things on the short side because time is limited. Plus it probably gets better show ratings when they smash things or yell Bamm when adding ingredients to the pan.
There are other ways to skin a garlic clove ya know.
So here’s my garlic tip for those out there that want to try a new way to slice it up.
The reason why I use this little technique is to help me remove the garlic skin gently and keep the whole clove intact. I like this method because I can either slice the garlic into paper thin slices or just mince it depending on the recipe. Either way to cut it takes about 30 seconds.
In some of my oriental recipes, I like using thinly sliced garlic, not minced because it reminds me of a recipe that I loved from a great Chinese recipe from one of my favorite restaurants. You never really catch me crushing garlic unless I make a garlic paste to spread on something.
Smashing the skin off is fine if you don’t care about having perfect thin slices, and are only going to throw it into a a garlic press or processor anyway.
I think you know what I’m talking about when I say smash garlic right? You know, the way you see chefs on TV doing it. They usually take the flat side of a large cleaver or knife and smash the garlic in order to remove the skin quickly. It usually breaks but the skin pops off easily.
So not to keep you waiting any longer here is the way I do it.
To Peel the Garlic Quickly and Slice it Thinly
- Wet the garlic clove before doing anything and your fingers will get wet in the process.
- Place on a small plate.
- Using a thin pointed knife cut the two ends of the clove off and discard.
- Stick the point of a small sharp knife under the skin and slide it down removing the skin. Usually it comes off fast but after a few times you’ll be a pro.
Now You Can Mince it or Slice it. Here’s How I Slice it
- After all of the skin is removed hold the garlic firmly against the plate.
- Using a small sharp knife just slice the garlic into about 20 or 30 thin slices (but take care to watch your fingers when slicing).
- When getting close the the edge you can flip the garlic over to the flat side touching the plate and slice the rest the best you can.
It’s very simple. Have fun.
Helpful tip if you’d like to use garlic to bring flavor to a recipe without overpowering keep reading.
This is very simple. Just place a whole peeled garlic clove into whatever your cooking and remove it later. Or you can cut the peeled into 2 pieces, and this will release just enough of its juice to your recipe without getting too garlic crazy. This is a great when only wanting a hint of garlic flavor in your recipes without getting too garlicy.
It’s simple and quick. You can also do this with onions. When using onions peel the skin off of course then, cut them in half so more of their juice will be released into your recipe while cooking.
OTHER TRICKS AND KITCHEN TIPS
Pouring Wine
Did you ever pour wine and hate when it drips down the side of the bottle when done? What do I do since I never buy the fancy absorbing ring protector and hate to get a kitchen towel dirty with wine just from a glass or two?
- I take a small piece of paper towel.
- Fold it into about a half of an inch by two inch piece.
- Then wrap it around the neck of the bottle about a half inch from the top and start pouring.
You can get the paper towel a little moist with some water first before attaching it to the bottle so it won’t fall off. Otherwise you can hold it with the same fingers from the hand your’re using to pour the wine with. When done just through out the used paper towel. There is no mess to clean up. It should have caught all the wine before running down the side of the bottle.